Research is rarely limited to a single contributor performing a single role. Behind every research output are people contributing in various ways: software development, data analyses, methodology design, and much more. Often, the same person contributes in several of these ways. Until now, Crossref metadata could only capture part of that picture, but this is changing with Schema 5.5.
Through user experience research (UXR) initiatives that take into account our diverse membership and community, we can have a continuous, deeper understanding of the role of metadata in our members’ workflows, and ensure that our work continues to meet our community’s needs. Your support is the key to this process, and will positively impact the wider community - and if you’d like to start today, you can take part in our latest initiative: help us improve our Events page by sharing your thoughts on the page’s feedback form.
Our 2026 Community Update took place on 13 May. Two calls, one for the eastern and one for the western time zone, highlighted how our global community is growing, how we’re refining the metadata that supports trust in the scholarly record, and connecting records more effectively through our latest tools.
Funding is one of the key enablers of the research lifecycle, but has been one of the hardest parts of the scholarly record to identify, describe and connect. This is slowly changing as we have recently reached a very exciting milestone for Crossref’s Grant Linking System (GLS). What makes it remarkable is not only the numbers reached, but where the data comes from. Research funders, who joined Crossref as members, have actively contributed more than 200,000 grants to the Research Nexus (Figure 1).
Add a user: from Add User, click Add New User. On the User Information form, enter the new user’s details. Use the Reporting Group drop-down to assign them to a reporting group. Choose a time zone and language (this will be the language they see in the user interface and welcome email). You may upload an image to be attributed to the user - click Choose File to choose an image file from your device. Under the User Permissions section, choose whether this user may: submit documents or only be a reader of shared documents, select a reporting group to which to assign documents when uploading, share their folders with other users, update their profile information, and whether you would like to make this user an account administrator. Click Create to add the user to the iThenticate account.
Add a list of users: from Add User, choose Upload User List. To see an example of a correctly-formatted user list, click examples. Click Browse, choose your file, and click Upload. Click View profile to adjust the settings for each user.
Edit a user’s information: click Edit to the right of the user’s email to make changes to a user’s details and permissions
Resend an activation email: when a new user is added, they are sent an activation email. To resend their activation email, click Send Activation.
Deactivate a user: from the User Information page, click Deactivate User. A deactivated user may no longer log in to iThenticate, but all files associated with them are retained, and still viewable by administrators. Click Activate User to reactivate a user and restore their access to the account and all of their submitted documents and folders.
Delete a user: from the User Information page, click Delete User to permanently delete this user from the account. Once a user has been deleted, all the documents they submitted are no longer accessible by the account administrator or shared users. If you accidentally delete a user, click undo in the banner beneath the top menu. If you navigate away from the page, Delete User cannot be undone.
Search for a user: enter the user’s name into the search field and click Search.
Groups (v1)
Use Groups to create reporting groups and add users to groups. By grouping users, you can track usage statistics of a group.
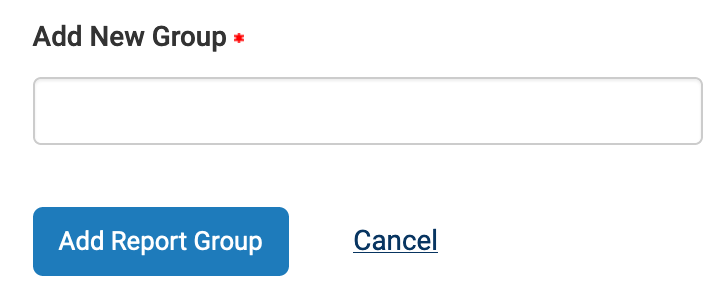
To create a new group, enter a name for the new group in the Add New Group field and click Add Report Group.
Add users to the group by going to the user’s profile, and use the Reporting Group drop-down menu to add them to a group.
Delete a reporting group from your account by clicking the X icon to the right of the group name, and click OK to confirm.
Change the name of a group by clicking the group’s name, edit the Update Group Name field, and click Update Group Name to save the new group name.
Reports (v1)
Under the Reports tab, you can access statistics for your account, reporting groups, and individual account users.
View usage statistics by user/group, month, or date range.
Click a group name to see more detailed usage statistics for the users in that group. Click a user’s name within a group to see their individual usage report, including document submissions, page count per month, and total submissions made.
Click your organisation name to see your organisation’s usage report, including statistics of all submissions by all account users. This will help you budget for the per-document invoice you’ll receive each January for the documents you’ve checked in the previous year. Learn more about fees for Similarity Check.
Click change by a report’s date range to change the date range. Enter dates in YYYY-MM-DD format or click the calendar icon to choose a date, then click Update Date Range
Please note that the report will display a maximum of 150,000 lines/submissions. If your volume of submissions checked is higher than this for the time period you’ve entered, you’ll need to adjust the date range to smaller increments.
Reporting on estimated usage for budgeting (v1)
Each January you’ll be invoiced two separate fees for Similarity Check. There’s the annual service fee (which is included in your annual membership invoice) and your annual per document checking fees for all the documents you’ve checked in the previous year.
We know it’s difficult to keep an eye on how many documents you’re checking, particularly if you have more than one person at your organisation using the service. However, do monitor your usage against the budget you set for Similarity Check. As the account administrator, you can keep up-to-date with how many documents have been checked in the Reports section under Manage Users. This can help you to estimate what you’ll be invoiced at the end of the year.
Once in the the Reports section under Manage Users, click Set Date Range, choose your date range, and then click Update Date Range.
What you see next will depend on how you’ve set up your iThenticate account.
All accounts will see an orange link in the name of your account, with the number of submissions and documents checked in the selected date range next to it. You can drill down into more information by clicking on the orange link - this will show documents checked by month across your account, split up by individual users.
If you’ve created groups, you’ll see a list of your groups with the number of submissions and documents checked in the date range for each group. You can drill down into more information by clicking on each group.
The difference between submissions and documents and why this report is just an estimate (v1)
There are two key columns on this table - Submissions and Document count.
The Submissions column shows the number of files you’ve submitted in iThenticate in your chosen date range, and the Document count shows how many documents these submissions are counted as. Some submissions include files that are so large that they’re considered two or more documents. Your per document fees invoice will be based on the Document count column.
While this report provides an estimate for the per document fees invoice you’ll receive in January, it won’t be an exact match. For example, we don’t charge you for the first 100 documents you check each year, and we try to avoid charging you if you accidentally submit the same document within a 24 hour period. You can find out more about these differences in our billing section.
Sharing preferences (v1)
From the Sharing tab, choose the type of sharing you would like to have for your account:
View only folders shared by other users (default)
View ALL users’ folders
View folders of selected users
To change the sharing type, select your preferred sharing type and click Update Sharing.
If you select the View folders of selected users option, you must also choose the users’ folders to be shared - to select a user, click the check-box next to their name, and click Update Sharing.
Set which non-administrator users may share folders by adjusting their permissions (learn more about user profiles.
Customize welcome email (v1)
A welcome email is sent to new users you add to your account. To customize this welcome message, start from the Email tab.
The customized message is prefixed to the automated email, but does not replace it. The text of the automated email cannot be changed, as it contains important information about your account.
Edit the Custom Email Subject and Custom Message fields as you wish, and click Set Custom Message. The Example “Welcome” Email Message will update to show you a preview of the welcome email.
Page maintainer: Kathleen Luschek Last updated: 2020-May-19